| INDEX | 1300-1599 | 1600s | 1700s | 1800s | 1900s | CROSS-ERA | ETHNO | |
| MISCELLANY | CONTACT | SEARCH | |
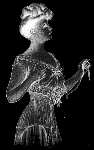
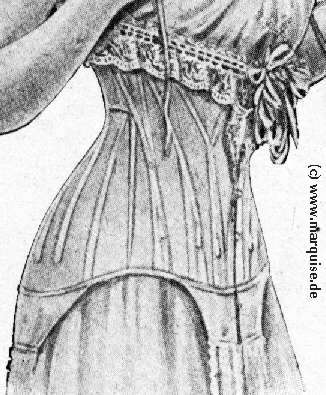
basic pattern: part 1, part 2, part 3, part 4 detailed view of the finished corset
This is what The Book says about the above pattern:
The best fabric is glazed drill or porose, light net fabric, which probably
denotes stiff linen weave fabrics e.g. of cotton.
In addition you'll need boning, of course, a busk, and eyelets. Second choice
after real whalebone, which is too expensive today, is polished steel boning,
especially the steel spirals which won't break even under heavy strain and are
thus especially advisable in the more curvy areas on the hips. (I wouldn't
use them anywhere outside these curvy areas as they are too flexible. See Odds
and Ends page on boning.)
Make sure the three important widths (breast, waist, hips) of the pattern are 3-5 cm less than those of your body. Then cut them out with only a small seam allowance and stitch them together with the seam allownces facing outwards. Install the lacing in back and the busk in front so you can try it on.
Lacing: Face the edge with a wide piece of cloth which you stitch twice down its length so that there's room for the lacing eyes in the middle and for boning at its sides. Hammer in the eyes and then install the boning, fixing it at the ends without tightening it.
Busk: Cut two strips of fabric the length of the corset front (if you use the porose variety of corset fabric, you should use something strong, such as satin, for these strips), fold them down their length and insert the busk parts so that the edges of the fabric face backwards and force the hooks and nails through the fabric. Insert the front edges of the corset between the edges of the busk cover and sew them together.
Now you can try it on. Pay attention to comfortable fit and any folds that might appear; they are a sign that the pattern doesn't quite fit your figure. Never hope that the boning will straighten that out - change the pattern! In most cases the folds will be due to a very curvy waist line or too tight a hip width, so loosen the seams there. Above the breast you'll need ample width, but not too much.
If you've straightened out any misfits you can seriously sew the parts together. Where the seams are curvy, cut the allowancces, iron them apart as flat as possible, and stitch them down so that they don't roll. Cover the seams and the middle of the wider parts with a strip of bias tape to hold the boning. Some corsets are only boned at one seam in front, side and back each while the rest is stiffened with strong, but not too thick cord sewn on with narrow stitches in rows of 3 or 4 and covered with strips of fabric.
The boning is often sewn on with deorative silk thread that doesn't fix the bone itself but only its ends, going through both layers of cloth, but you can fix the whole thing with a few stitches. For wide hips it's a practical thing to insert the hip boning through small slits in the covering strips so you can renew them: boning has been known to take on the shape of the body over time, which isn't all too becoming.
Finally you cover the upper ad lower edges of the corset with strong linen ribbon. The upper edge can be decorated at your discretion.
Content, layout and images of this page
and any sub-page of the domains marquise.de, contouche.de,
lumieres.de, manteau.de and costumebase.org are copyright (c) 1997-2022 by Alexa Bender. All rights
reserved. See Copyright Page.

GDPO


This work is licensed under a Creative Commons License.