| INDEX | 1300-1599 | 1600s | 1700s | 1800s | 1900s | CROSS-ERA | ETHNO | |
| MISCELLANY | CONTACT | SEARCH | |
|
|
After the coat, the waiscoat is largely smooth sailing.
 |
|
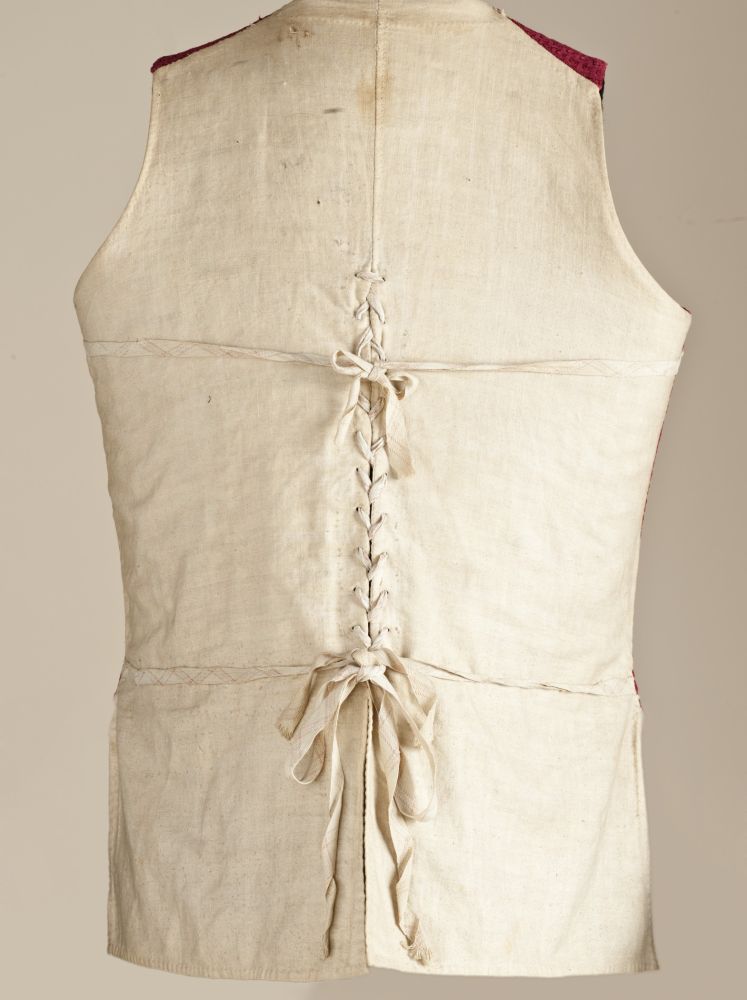
Waistcoat, c. 1750 |
Waistcoats usually consist of two layers of lining fabric in back and one laxer of lining plus one layer of fashion babric in front.
The back can be made in three ways, all of which can be found on extant period waistcoats:
The picture to the right combines the first two variants. Both see to it that the front of the waistcoat lies smoothly around the front, even if the wearer changes shape now and then. These instructions assume a laced back because it is most variable, e.g. if the waistcoat is rarely worn (reenactment) or by different wearers (theatre).
After cutting, insert the pockets first. If the waistcoat fabric isn't too stiff, the pocket bags should be relatively small or made of a light fabric so as not to distort the shape by weighing the top fabric down. A strip of firm linen along the front edge, as in the coat, is always advisable.
The two back parts are sewn together only at the top, from the neck opening about 20 cm down, i.e. roughly to the level of the lower end of the armhole. Same for the lining. If you want to have top fabric on the lower part of the back (recommended for long, pre-1750s waistcoats), baste it onto the outer layer of the back parts now and treat it as one with the back parts. Attach the fronts and only close the side seams up to the bend at waist level. Close shoulder seam and iron the seams flat.
Place the layers of the back onto each other, left on left. Where the centre back seam is open, they are seamed together with the edges folded under, forming a slit right down to the seam. On either side of the slit, make lacing eyelets as described for stays. See also "The Zen of Spiral Lacing". As with stays, the eyelets must be offset. The lacing goes from the top of the slit to about waist level. From there on, the slit is left to hang open.
Of course you can also sew the centre back closed, but if your circumference changes a bit, the waistcoat could quickly become too large or too small. Neither looks good. Some people compromise by cutting the back garger than is really necessary, then attaching 2-5 pairs of lacing tapes on either side of the centre back. I haven't seen this quick'n'dirty solution seen used in period yet – it seems to be more typical of rental costumes.
To sew the armholes, turn the waistcoat around so that the left sides face out. I recommend only basting them at first, then trying the waistcoat on to see whether the armholes are the right size. If you're sure they are, sew them left-on-left and make little cuts into the seam allowance, at tight angles to the seam. Turn right side out again and iron the seams.
The side slit and front edges are seamed together the same way as the slits/front edges of the coat.
As with the coat, leaving the waistcoat to hang a while before hemming it is a good idea, but since the hem usually isn't quite as wide and curved, and both layers of the back made of the same fabric anyway, it's more a precaution than a necessity.
Sew on buttons and make buttonholes. In contrast to the coat, most if not all buttonholes are functional because the waistcoat is always worn buttoned, at least from the end of the breast bone to the lower belly.
If the suit is supposed to work for pre-1750s, cut the fronts (coat and waistcoat) straighter and both fronts and backs of the waistcoat longer so that the waistcoat is only 5-10 cm shorter than the coat and can be buttoned all the way down. Apart from that, this pattern is a relatively conservative style anyway.
Next chapter: Wear and care
Saturday, 18-May-2013 00:31:06 CEST
Content, layout and images of this page
and any sub-page of the domains marquise.de, contouche.de,
lumieres.de, manteau.de and costumebase.org are copyright (c) 1997-2022 by Alexa Bender. All rights
reserved. See Copyright Page.

GDPO


This work is licensed under a Creative Commons License.